【Orthopedic Arthroscopy】Arthroscopic treatment of traumatic anterior shoulder instability
Release time: 21 Jun 2022 Author:Shrek
There are many treatment options for traumatic anterior shoulder instability, and the important factors for obtaining satisfactory results include adequate exposure and correct surgical techniques. Today, let's learn about the surgical techniques of shoulder arthroscopy for the treatment of traumatic anterior shoulder instability.

Indications for surgery
Absolute indications: Those with a clear history of trauma and two or more dislocation experiences, and the patient himself also wishes to cure the dislocation, have absolute surgical indications.
Relative indications: In cases with only one dislocation, some of them can also be considered as indications for surgery. For example, players who play rugby or American football, playing competitive sports; cases with definite osseous Bankart lesions after primary dislocation; players who engage in over-the-top sports; dislocation on the dominant side; fear of being unable to perform after initial dislocation Sports players are considered to have surgical indications. During the operation, the sports the player is engaged in and the timing of returning to the field should be considered first, and then the period of the operation should be decided. Most of the patients undergoing surgery are between the ages of 10 and 30.
Surgical Skills
Preoperative preparation and surgical position
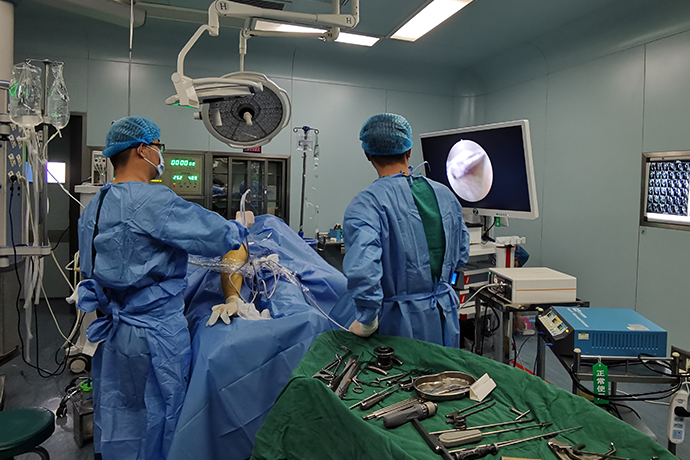
General anesthesia, surgery in the beach chair position. When setting the beach chair position, the head and torso need to be fixed on a special posture bench, adjust the torso to form a 60° angle with the ground, and adjust the face support to tilt it toward the healthy side.
The shoulder joint should be fully exposed on the paving sheet, and the arthroscope and various connecting wires should be organized and neatly arranged to ensure sufficient working space during the operation.
Add-on displacement test and examination under anesthesia
Manual examination of shoulder stability after general anesthesia allows for a more objective assessment. When this test is performed in an outpatient setting, objective assessment is difficult due to the protective effect of the muscles.
Inspection operation: perform in the neutral position of shoulder abduction and 90° internal and external rotation. Apply stress to the front, front and lower, lower and rear directions for inspection, and then apply stress to the front, lower and rear directions in the sagging position, and compare and evaluate the shoulder joint on the unaffected side. For the anterior instability caused by trauma, if the instability is accompanied by the relaxation of the joint capsule, additional suture of the rotator cuff gap should be considered after the Bankart repair is completed.
Establishment of Posterior Approach and Microscopic Diagnosis
A local anesthetic was injected subcutaneously from the posterior soft point to the glenohumeral joint, and 400,000-fold diluted epinephrine was added to the local anesthetic, and the direction of the joint space was confirmed.
A 5mm incision was made at the site where the subcutaneous local anesthetic was injected, and a puncture cone was inserted into the glenohumeral joint.
Retain the outer sleeve, insert the arthroscope from the back, observe the labrum from above to the front, and find the Bankart injury. Move the arthroscope to the rotator cuff space and the rotator cuff attachment to continue the observation.
The patient's shoulder was abducted with the assistance of an assistant, and the arthroscopic lens was slid behind the humeral head, revealing a Hill-Sachs injury.
The assistant abducted and externally rotated the affected limb to lift the humeral head forward and upward, so that the surgeon could observe the structure behind and below.
After confirming the state of the lower joint capsule, the camera returns to the rotator cuff space.
Establish a forward approach
Touch the front subcutaneous coracoid process, confirm the direction from the outer side of the coracoid process, and insert the 18G syringe needle.
The point where the needle of the syringe is inserted should be just above the upper border of the subscapularis muscle. Because an anterior-superior approach is to be established later, the anterior approach should be located as far below the rotator-cuff space as possible.
Then, the degree and extent of Bankart's injury were observed by microscopy through the anterior approach, and the attachment point of ICHL on the humeral side was observed by microscopy.
The entire glenoid was observed from the front, and the position of the 6 o'clock and the extent of the labral avulsion were confirmed.
When an anterior approach is established, blood vessels are sometimes damaged resulting in excessive bleeding. The treatment method is to move the arthroscope of the posterior approach to the anterior approach. After inserting the arthroscope, the bleeding blood vessels can be approached and the bleeding site can be found, which can facilitate the hemostasis operation. In the case of large blood vessel bleeding, when pure blood fluid flows from the drainage incision, hemostasis should be performed as soon as possible.

Management of combined other injuries (SLAP injury, joint capsule rupture, HAGL injury, etc.)
Treat the combined well damage first before treating the Bankart damage. That is, the first repair of joint capsule ligament rupture or HAGL injury.
When there is SLAP injury that needs to be repaired, a transrotator cuff approach is established at the lateral center of the acromion, and after freshening the labrum and bone bed, the Bankart injury is repaired.
Release of the labral ligament complex (dissection of the inferior glenohumeral ligament complex)
The glenoid ligament complex adhering to the glenoid neck was dissected under the anterior approach.
During the stripping operation, the position of the right shoulder at 2-4:30 is stripped with a distal straight bone rasp, and the position beyond 4:30 is stripped with a bone rasp with a curved tip. The main point of this operation is to release and strip the lower labral ligament complex as much as possible so that the IGHL can be finally tightened and sutured.
The surgery can be performed in the beach chair position, and the assistant can retract the shoulder joint to release the lower labrum.
The degree of relaxation of the joint capsule determines the depth and extent of release. In the case of joint capsule laxity, the right shoulder can be peeled off to the level of 8 o’clock, and in the case of joint stiffness, it can be peeled and released to the level of 7 o’clock at most, and it is important to lift the lower joint capsule to the level of the glenoid.
Release of the labral ligament complex requires visibility of the underlying subscapularis muscle belly to allow full range of motion.
After the peeling is completed, the scope of the peeling is confirmed from the front mirror, and the position of the implanted anchor is estimated.
Surgical skills and precautions
In order to improve the healing ability of the labrum, the articular cartilage with a width of 3 to 5 mm was excised at the position equivalent to 3 to 7 o'clock.
Repair of the inferior glenohumeral ligament complex
Implant anchors and sutures
In principle, 4 anchors are implanted. Anchors were implanted equally spaced at 6-2 o'clock on the right shoulder.
Depending on the presence or absence of bone fragments and the shape of the glenoid, the location of the anchors will be slightly different. Generally, one anchor will be implanted at 6:00, 4:40, 3:20, and 2:00.
Implantation and suture of 6-point anchor
The guide was inserted approximately 1/2 the depth of the cartilage, and the anchor was implanted into the glenoid.
Use high-strength wire for the tail of the anchor. After placement of the 6-point anchor, an anterosuperior approach was established.
The suture was drawn from the anterosuperior approach, and the suture was sutured to the labrum with a 7mm locking Caspari suture forceps.
4:40 Anchor implantation and suturing
Sutures are sutured to the labrum as in the 6-point approach.
In the joint cavity, the PDS II line was used to pass the line, and the labral ligament complex was reduced with tissue grasping forceps, and the suture was knotted and fixed from the 4:40 point.
3:20 Anchor implantation and suturing
Knot the hardest 6 o'clock anchor.
Grasp the labral ligament complex with tissue graspers and suture the labrum at 3:20 using a straight suture hook. Cases with osseous Bankart require repair.
If a free bone fragment is found at 5 o'clock before surgery, after the release, most of them need to be pulled to the position of 3:30 to 2:30 and sutured with a bone puncture device.
2-point anchor implantation and suturing
The suture of the proximal 2-point anchor suture is usually sutured with suture grabbers.
After all the sutures were completed, the state of the labrum after labrum repair was observed again through the anterior and posterior approaches.
Surgical skills and precautions
1. When suturing the proximal end, the anchor should not invade too much joint capsule, too tight, and avoid suturing the middle glenohumeral ligament, so as not to limit the external rotation.
2. If the muscles are developed and the anterior joint space cannot obtain enough space for operation, a posterior inferior approach is established, and the operation is performed from this approach with a suture hook.
3. The angle of external rotation of the shoulder joint on the affected side and the unaffected side must be recorded before surgery, and the angle of external rotation should be confirmed again after suture. The angle of external rotation must be confirmed under arthroscopic surveillance of the sutured joint capsule. The surgeon placed the affected limb on the side of the body and recorded the external rotation angle without internal rotation resistance. The external rotation angle must reach the preoperative target angle, and there should be no external rotation limitation. If external rotation is limited after surgery, it will affect future sports competition. If intraoperatively found to have limited external rotation. Additional incision of the joint capsule is required to improve external rotation.
Measures to tighten the joint capsule: suture the rotator cuff gap
According to the age of the patient, the type of exercise, the shape of the glenoid, the laxity of the unaffected joint under anesthesia, etc., the rotator cuff gap can be additionally sutured in cases with a high possibility of instability.
An 18G epidural needle was used to introduce the loop of the PDS II line from the anterior approach and penetrated the fibers above the subscapularis tendon.
Usually, two sutures are performed, dividing the rotator cuff gap into 3 equal parts, and the first stitch is sutured in the outer 1/3.
After the PDS II wire ring was introduced into the joint, an ideal suture thread guide was inserted through the anterior approach, and the joint capsule was penetrated from above the SGHL, and the PDS II wire ring was grasped.
Pull the PDS II wire ring out of the joint, and guide the high-strength wire into the joint.
Under arthroscopic monitoring, extra-articular knots were immobilized.
close the incision
The skin incisions of each approach were sutured, and the patient was given a brace after the operation was completed. After the patient was moved to a flat car, the general anesthesia cannula was pulled out.
Postoperative Bankart injury combined with Hill-Sachs injury, underwent endoscopic repair. The Bankar injury was repaired with 4 anchors, and the rotator cuff gap was additionally sutured.
Post-operative care and rehabilitation
Postoperative bracing for 3 weeks. From the second day of surgery to discharge, he underwent physical therapy rehabilitation in the hospital.
After discharge, 6 months of physical therapy rehabilitation and 6 months of exercise rehabilitation are required before sports activities can begin.

- Recommended news
- 【General Surgery Laparoscopy】Cholecystectomy
- Surgery Steps of Hysteroscopy for Intrauterine Adhesion
- [Otolaryngology Otoscopic Section] Excision of Cholesteatoma in the External Auditory Canal
- [Otolaryngology Nasal Endoscopy] How to Treat Recurrent Rhinitis
- [ENT Surgery: Nasal Endoscopy] Endoscopic Treatment of Nasal Polyps