Surgery Steps of Hysteroscopy for Intrauterine Adhesion
Release time: 19 Aug 2020 Author:Shrek
【Hysteroscopy】Surgery Steps of Hysteroscopy for Intrauterine Adhesion
Intrauterine adhesions (IUA), also known as Asheman syndrome, is caused by trauma to the uterine uterus during pregnancy or non-pregnancy, resulting in damage to the basal layer of the endometrium and partial or complete occlusion of the uterine cavity, leading to abnormal menstruation, infertility, or repeated miscarriage. Its essence is intimal fibrosis.
What this article is sharing today is the procedure of hysteroscopic hysterectomy and scissors separation.
Surgical steps of hysteroscopic hysterectomy
1) Fill the bladder, place the probe carefully under the guidance of B-mode ultrasound, and use Hegar to dilate the cervix and uterine cavity one by one. If the probe cannot reach the bottom of the uterus or only penetrates into the cervical canal in patients with locked uterine cavity, it can be opened later by hysteroscopy, or under the supervision of B-mode ultrasound, the probe can be probed forward along the cervix and midline of the uterus. The bottom of the palace.
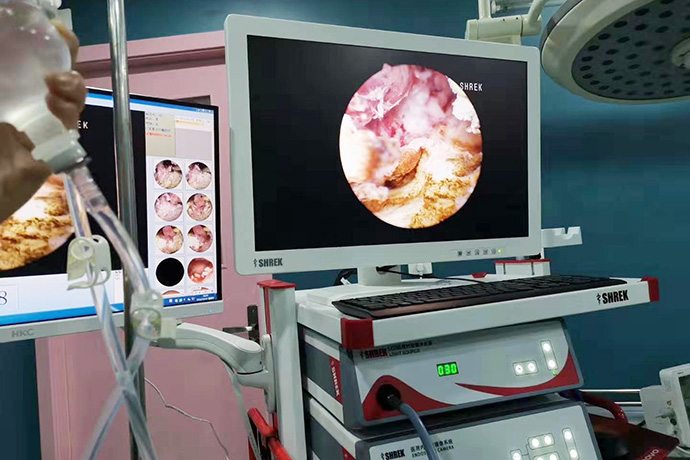
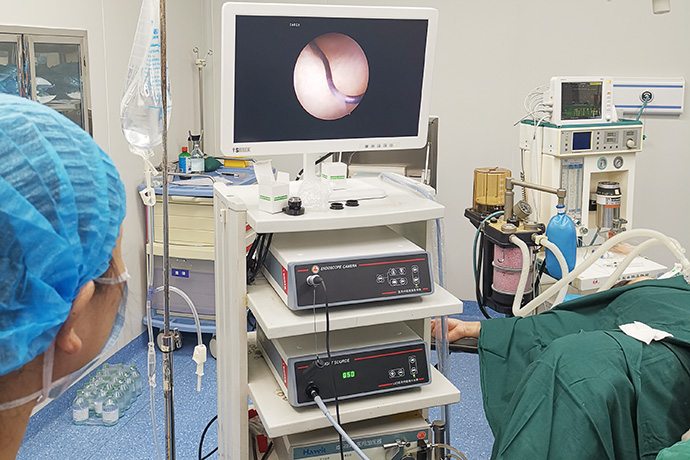
(2) Under the guidance of B ultrasound, the hysteroscope is inserted into the uterine cavity along the external cervix and cervical canal. Check the morphology of the cervical canal and uterine cavity, observe the double measurement of the uterine angle and the opening of the fallopian tube, reveal the adhesion tissue, and determine the location and extent of adhesion.
(3) The needle electrode of the hysterectomy mirror or the ring electrode can be used to remove the dense adhesion scar tissue in the cervical canal.
(4) Central membranous or fibrous adhesion tissues in the uterine cavity can be cut with hysteroscope needle electrodes or resection with ring electrodes. The normal endometrium needs to be protected during the operation.
(5) For the adhesion scar tissue on the anterior, posterior and side walls of the uterine cavity, a needle electrode can be used to cut along the long axis of the uterus, and if necessary, use a ring electrode to excise it.
(6) The adhesion of the fundus and corners of the uterus needs to be cut horizontally with needle electrodes or cut horizontally with ring electrodes to fully open the fundus. At the same time, the cutting moves toward the corners of the uterus, and try to open the corners of both sides to expose the oviduct opening. Generally, under B-mode ultrasound monitoring, a needle electrode is used to separate the adhesive tape at the common corner, and if necessary, a ring electrode is used to cut the adhesive tissue to gradually expose the uterine horns and fallopian tube openings and restore the normal shape of the bilateral uterine horns. Attention should be paid to protecting the normal endometrial tissue at the corner of the uterus.
(7) For patients with uterine cavity constriction caused by scar spasm of the uterine wall, needle electrodes can be used to cut 4 to 5 scar tissues radially along the long axis of the uterus to enlarge the uterine cavity volume.
(8) If the uterine cavity is closed and the front of the scope is blind, under the supervision of B-mode ultrasound, use needle electrodes or ring electrodes along the midline of the cervix and uterus to energize and push forward, try to open the adhesive tissue and cut out The pores reveal the uterine cavity. Then follow the above steps to remove the intrauterine adhesions and restore the normal uterine cavity shape .
(9) At the end of the operation, retract the objective lens to the internal cervix to observe the shape and symmetry of the uterine cavity.
(10) For those with laparoscopic monitoring, methylene blue solution can be injected into the uterine cavity to test the patency of the fallopian tube, and observe the patency of the fallopian tube under laparoscopy.
- Recommended news
- 【General Surgery Laparoscopy】Cholecystectomy
- Surgery Steps of Hysteroscopy for Intrauterine Adhesion
- [Percutaneous Endoscopic Lumbar Discectomy] Percutaneous endoscopic lumbar discectomy for lumbar disc herniation
- [Urology Cystoscopy Section] Cystoscopic Laser Lithotripsy
- [Laparoscopic Urology] Laparoscopic Radical Right Nephrectomy